iPhone Camera Malfunction? Learn Fixes from Certified Repair Experts
A fully functional camera is one of the biggest reasons people rely on their iPhones every day. Whether it’s for capturing memories, scanning documents, attending online meetings, or shooting high-quality videos, the iPhone camera plays a major role in daily life. That’s why any iPhone camera malfunction—blurry photos, apps freezing, or a camera that won’t open—can feel frustrating and disruptive.
This expert-driven guide explains the most common causes behind iPhone camera not working, practical steps you can safely try at home, and when it becomes crucial to let certified technicians handle the issue. The goal is to help you diagnose the problem properly and understand the safest repair path.
Understanding the Importance of a Fully Functional iPhone Camera
Apple designs its cameras with precision hardware and advanced software. A malfunction can directly affect:
- Photo and video quality
- FaceTime and video calling
- Social media and content creation
- Professional tasks such as scanning documents
- App functions that rely on AR, QR codes, or face detection
Because the camera system combines lenses, sensors, flex cables, stabilization modules, and software controls, even small issues can lead to noticeable performance problems. Certified repair experts emphasize that diagnosing the camera requires detailed inspection to avoid further complications.
Common Reasons Behind iPhone Camera Malfunctions
Understanding the root cause is the key to an effective fix. Below are the most frequent reasons for iPhone camera malfunction, covering both hardware and software sides.
1. Software Bugs or App Conflicts
iOS updates, corrupted settings, and conflicting apps can make the camera app freeze, show a black screen, or refuse to switch between front and rear cameras.
Signs include:
- Camera app loads but stays black
- Camera closes automatically
- Switching between lenses freezes
- Third-party apps show “camera not available”
2. Storage Issues
When an iPhone runs out of storage, the camera may not capture photos or videos properly.
Symptoms include:
- Shots don’t save
- Warning messages related to storage
- Camera performance becomes slow
3. Dirty, Smudged, or Scratched Lenses
Even a tiny smudge can make images blurry. Scratches and dust can disrupt the sensor’s focus ability.
Symptoms include:
- Blurry iPhone camera output
- Foggy, washed-out photos
- Light streaks or glare
4. Hardware Damage from Drops or Impact
The camera is one of the most delicate components. Drops can loosen the stabilization system, crack the lens, or break the connecting flex cable.
Common signs:
- Shaking or vibrating preview
- Clicking sounds from inside
- Rear or front camera not opening
- Portrait mode failing repeatedly
5. Water or Moisture Exposure
Even with water-resistant models, moisture can penetrate through speaker grills, buttons, or cracked backs.
Effects include:
- Fog under the lens
- Camera switching malfunction
- Complete failure of the rear camera module
6. iPhone Overheating
High temperatures can shut down the camera temporarily.
You may see:
- “iPhone needs to cool down before you can use the camera”
- Slow camera response
- Crash while using video mode
7. Physical Interference from a Case or Screen Protector
Some cases, especially low-quality ones, block the lens or cause reflections.
8. Faulty OIS (Optical Image Stabilization) Module
This is common after drops or manufacturing issues. It causes vibration, shaking, or distorted images.
9. Faulty Camera Hardware or Sensor Failure
Internal components like the sensor, flex cable, or processing chip may fail due to age or damage.
Simple Fixes Users Can Try at Home
Before visiting a technician, you can try several safe troubleshooting steps. These do not require tools or technical skills.
1. Restart Your iPhone
A simple restart clears temporary bugs.
How it helps:
- Resets camera processes
- Fixes minor freezes or black screens
2. Force Close the Camera App
Swipe up from the bottom (or double-tap Home button) → close the Camera app → reopen it.
This resolves app-level crashes.
3. Switch Between Camera Modes
Sometimes toggling modes resets the camera.
Try:
- Photo → Video → Portrait → Front Camera → Back Camera
4. Check Storage Space
Go to Settings → General → iPhone Storage.
If space is nearly full:
- Delete unnecessary videos
- Remove unused apps
- Clear large files from messaging apps
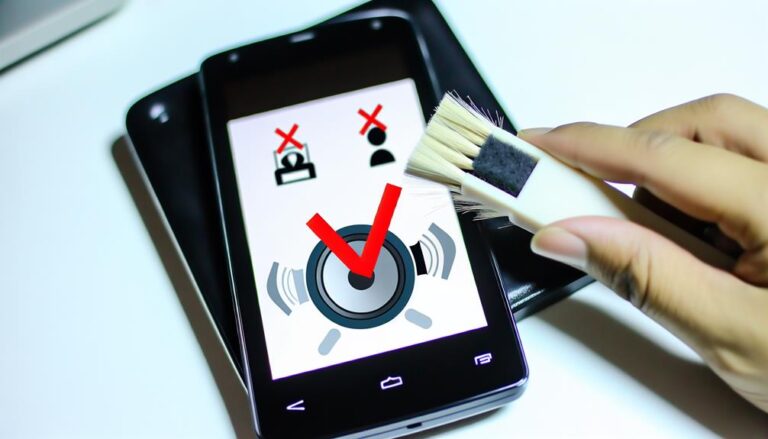
5. Clean the Camera Lens
Use a microfiber cloth. Avoid tissue or rough fabric.
Avoid:
- Liquids
- Excessive pressure
- Sharp objects
6. Remove Protective Case and Screen Guard
Cases can block ultrawide or telephoto lenses, especially on multi-lens iPhones.
7. Reset All Settings
(Does not erase personal data)
Go to Settings → General → Transfer or Reset iPhone → Reset → Reset All Settings.
This solves:
- Configuration conflicts
- Permission errors
- Camera app glitches
8. Update iOS
Go to Settings → General → Software Update.
Updates often fix bugs causing iPhone camera not working issues.
9. Test Camera Using Other Apps
Try using:
- Zoom
If those apps also fail, it is likely a system-level or hardware problem.
10. Check for Physical Damage
Look for:
- Cracks on the lens
- Fog inside the camera
- Loose lens movement
- Rattling inside
If you notice any of these, home fixes won’t help. A technician is required.
When to Seek Professional Repair Help
Some issues require certified repair expertise because the camera system is extremely sensitive. Attempting DIY repairs can worsen the damage.
Below are clear signs it’s time to visit trained technicians.
1. Persistent Blurriness Despite Cleaning
If the lens is clean but the camera still won’t focus, this may mean:
- Loose autofocus motor
- Damaged OIS
- Internal dust
2. Camera Shaking, Vibrating, or Producing Distorted Images
This often indicates:
- OIS failure
- Dislodged lens
- Sensor malfunction
These components require special tools and calibration.
3. iPhone Rear Camera Issue After a Drop
Drops commonly affect the rear module because it contains multiple lenses, sensors, and stabilizers.
If you notice:
- Black screen
- Flash not working
- Unable to switch lenses
Professional diagnosis is necessary.
4. iPhone Front Camera Fix Cannot Be Solved with Settings
The front camera is attached to sensitive components, including Face ID hardware. Incorrect repairs can disable Face ID entirely.
Seek help if:
- Front camera is black
- Portrait mode is inconsistent
- FaceTime fails to load
5. Fog or Moisture Under the Lens
Moisture inside the camera requires safe disassembly and drying techniques. Delayed repair may cause corrosion.
6. Camera App Crash Immediately on Launch
If all software steps fail, the internal camera module may be damaged.
7. Flashlight Not Working with the Camera
The flash and camera share internal circuits. If both fail, hardware repair is needed.
8. Camera Lens Cracked or Scratched
A damaged lens directly affects quality. Replacing it requires precision tools.
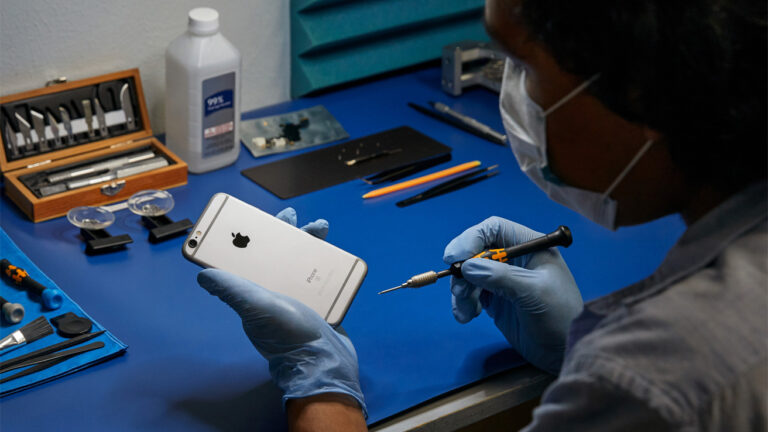
Why Certified Experts Like Dr Mobile Provide Safe and Reliable Repairs
Modern iPhones have complex multi-lens camera systems that include:
- Ultra-wide lens
- Wide lens
- Telephoto lens
- LiDAR sensors (on Pro models)
- OIS and EIS stabilization
- Laser autofocus
- High-precision flex cables
Because of this complexity, inexperienced repairs can cause:
- Further camera failure
- Damage to Face ID components
- Loss of waterproofing
- Broken connectors
- Permanent sensor damage
Certified repair experts eliminate these risks through proper diagnostics and techniques.
1. Accurate Diagnosis
Professionals use specialized testing tools to inspect:
- Camera sensors
- Flex cable functionality
- Stabilization motors
- Lens alignment
- Software logs
This ensures the exact issue is identified before repair.
2. Controlled Repair Environment
Camera modules are sensitive to dust and fingerprints. Certified technicians work in clean environments to prevent contamination.
3. Precision Tools for Disassembly
iPhones contain delicate connectors. Certified experts use:
- Adhesive-removal machines
- Microscope-assisted tools
- Proper heat stations
- Professional-grade screwdrivers
These prevent accidental damage.
4. Safe Camera Replacement and Calibration
Replacing a camera is not just swapping parts. Experts also:
- Calibrate focus
- Test lens alignment
- Verify stabilization
- Check compatibility with the logic board
5. Protection of Other Components
The camera sits close to:
- Battery
- Display cables
- Face ID components
Professionals ensure these parts remain untouched.
6. Reliable Parts and Techniques
Certified repair services use high-grade components that match iPhone standards, avoiding issues like:
- Lens distortion
- Incorrect white balance
- Focus problems
7. Post-Repair Quality Testing
After repairs, experts run diagnostics to ensure:
- Rear and front cameras work properly
- Flash and portrait mode function
- All lenses switch smoothly
- Video stabilization is active
- Camera apps run without freezing
This ensures reliability.
Preventive Tips to Avoid Future Camera Problems
Following good habits can extend the lifespan of your iPhone camera.
1. Use a Quality Case with Proper Camera Cutouts
Avoid cases that block or reflect light across the lenses.
2. Protect the Camera Lens
Use a trusted lens protector to prevent scratches.
3. Avoid Extreme Temperatures
Both excessive heat and cold affect camera performance.
4. Prevent Moisture Exposure
Avoid using the iPhone camera in high-humidity environments.
5. Clean the Lens Regularly
A soft microfiber cloth is enough.
6. Update iOS Frequently
Software updates improve camera performance.
7. Handle the Phone Carefully
Even minor drops can loosen internal camera components.
Conclusion
An iPhone camera malfunction can range from a simple software issue to a complex hardware failure. Many basic issues—like blurry images, app freezes, or permission conflicts—can be fixed with safe at-home troubleshooting steps. However, damage from drops, moisture, or sensor failure requires expert handling.
Certified technicians ensure safe disassembly, accurate diagnostics, proper calibration, and long-term reliability. Understanding the causes and solutions helps you make informed decisions and protect your device.